...and nine months later.
10th November 2023 - Customer location: Brisbane
It took me 5 years from the time I first thought of making my boys 21st birthday family rings to the time I finally figured out how to make it. My boys were very patient, a customer might not be.


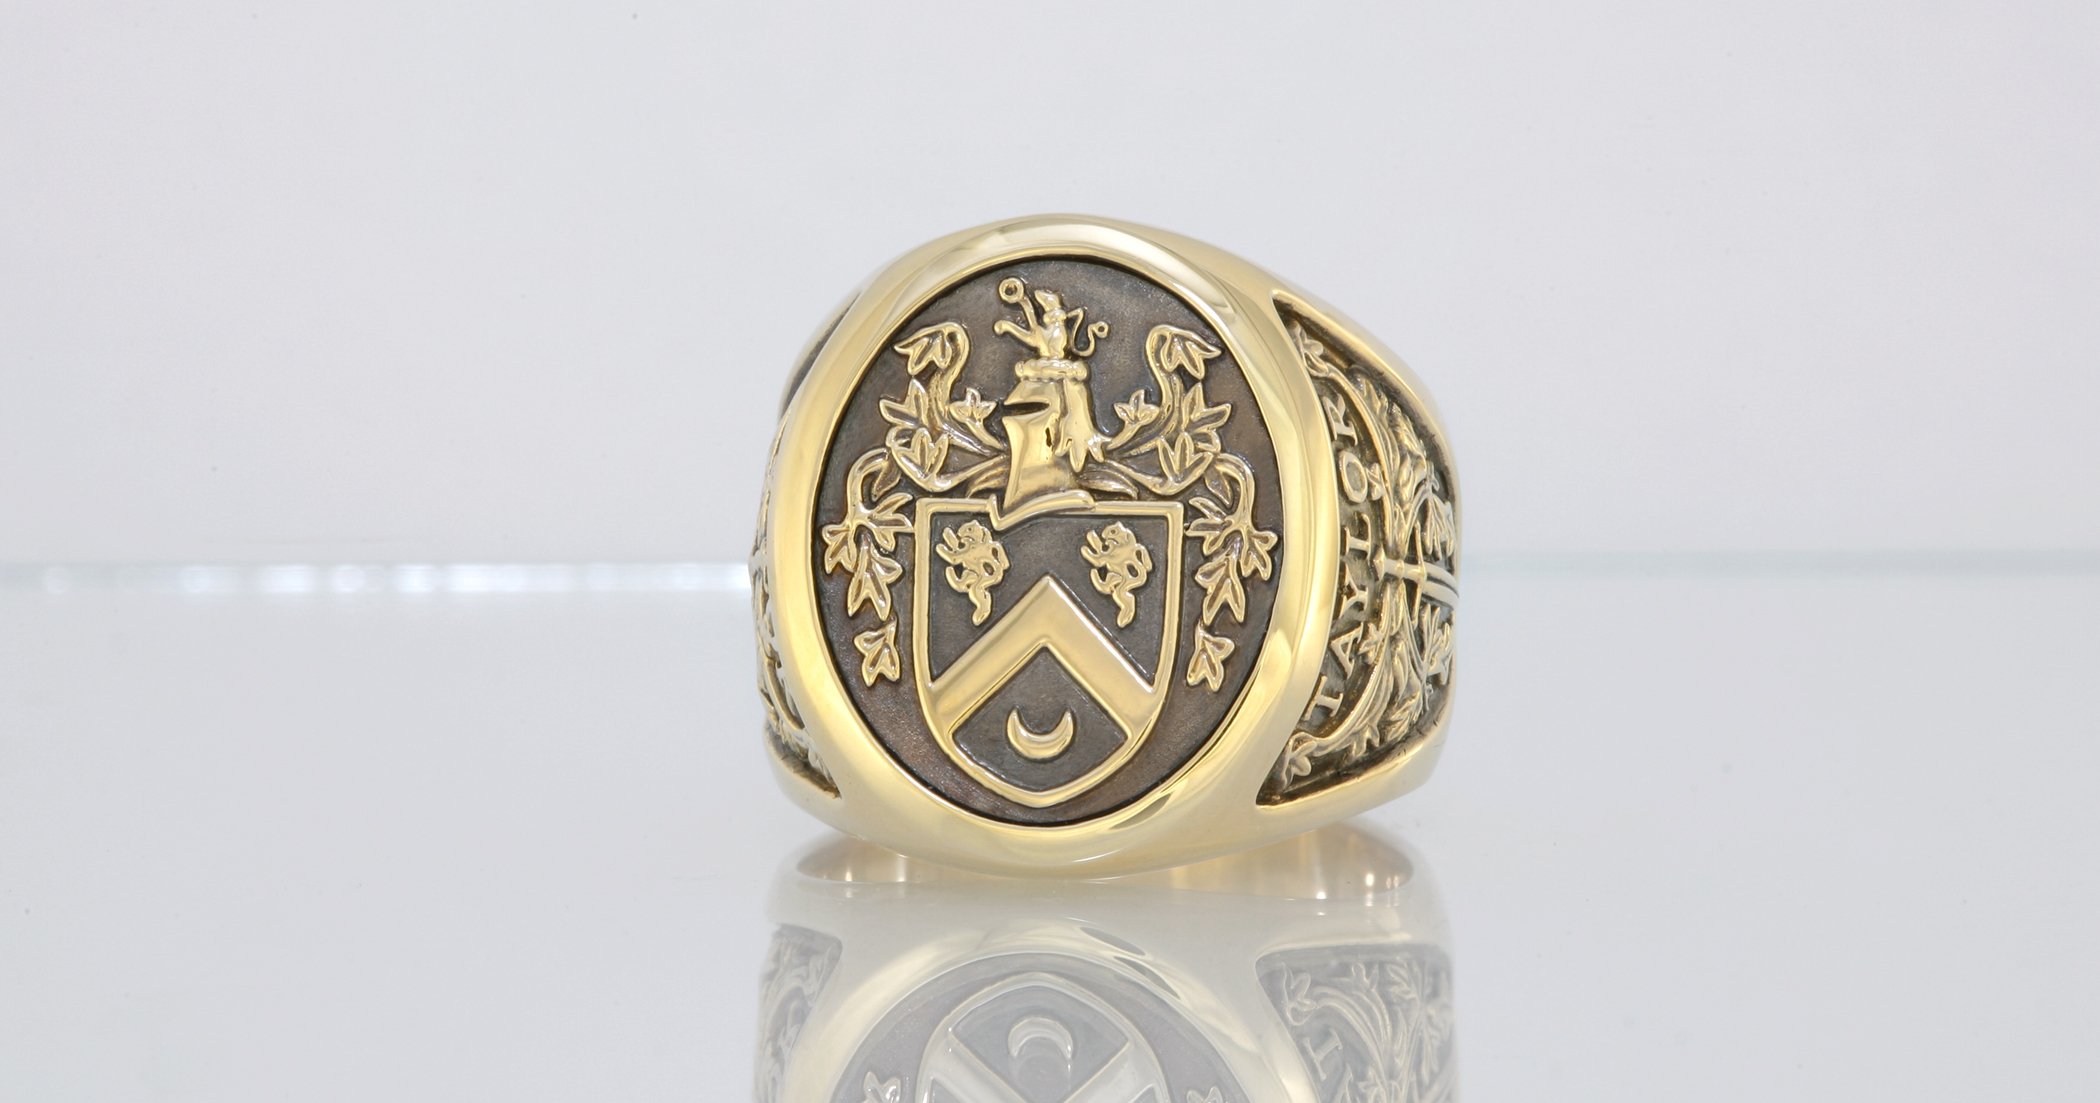
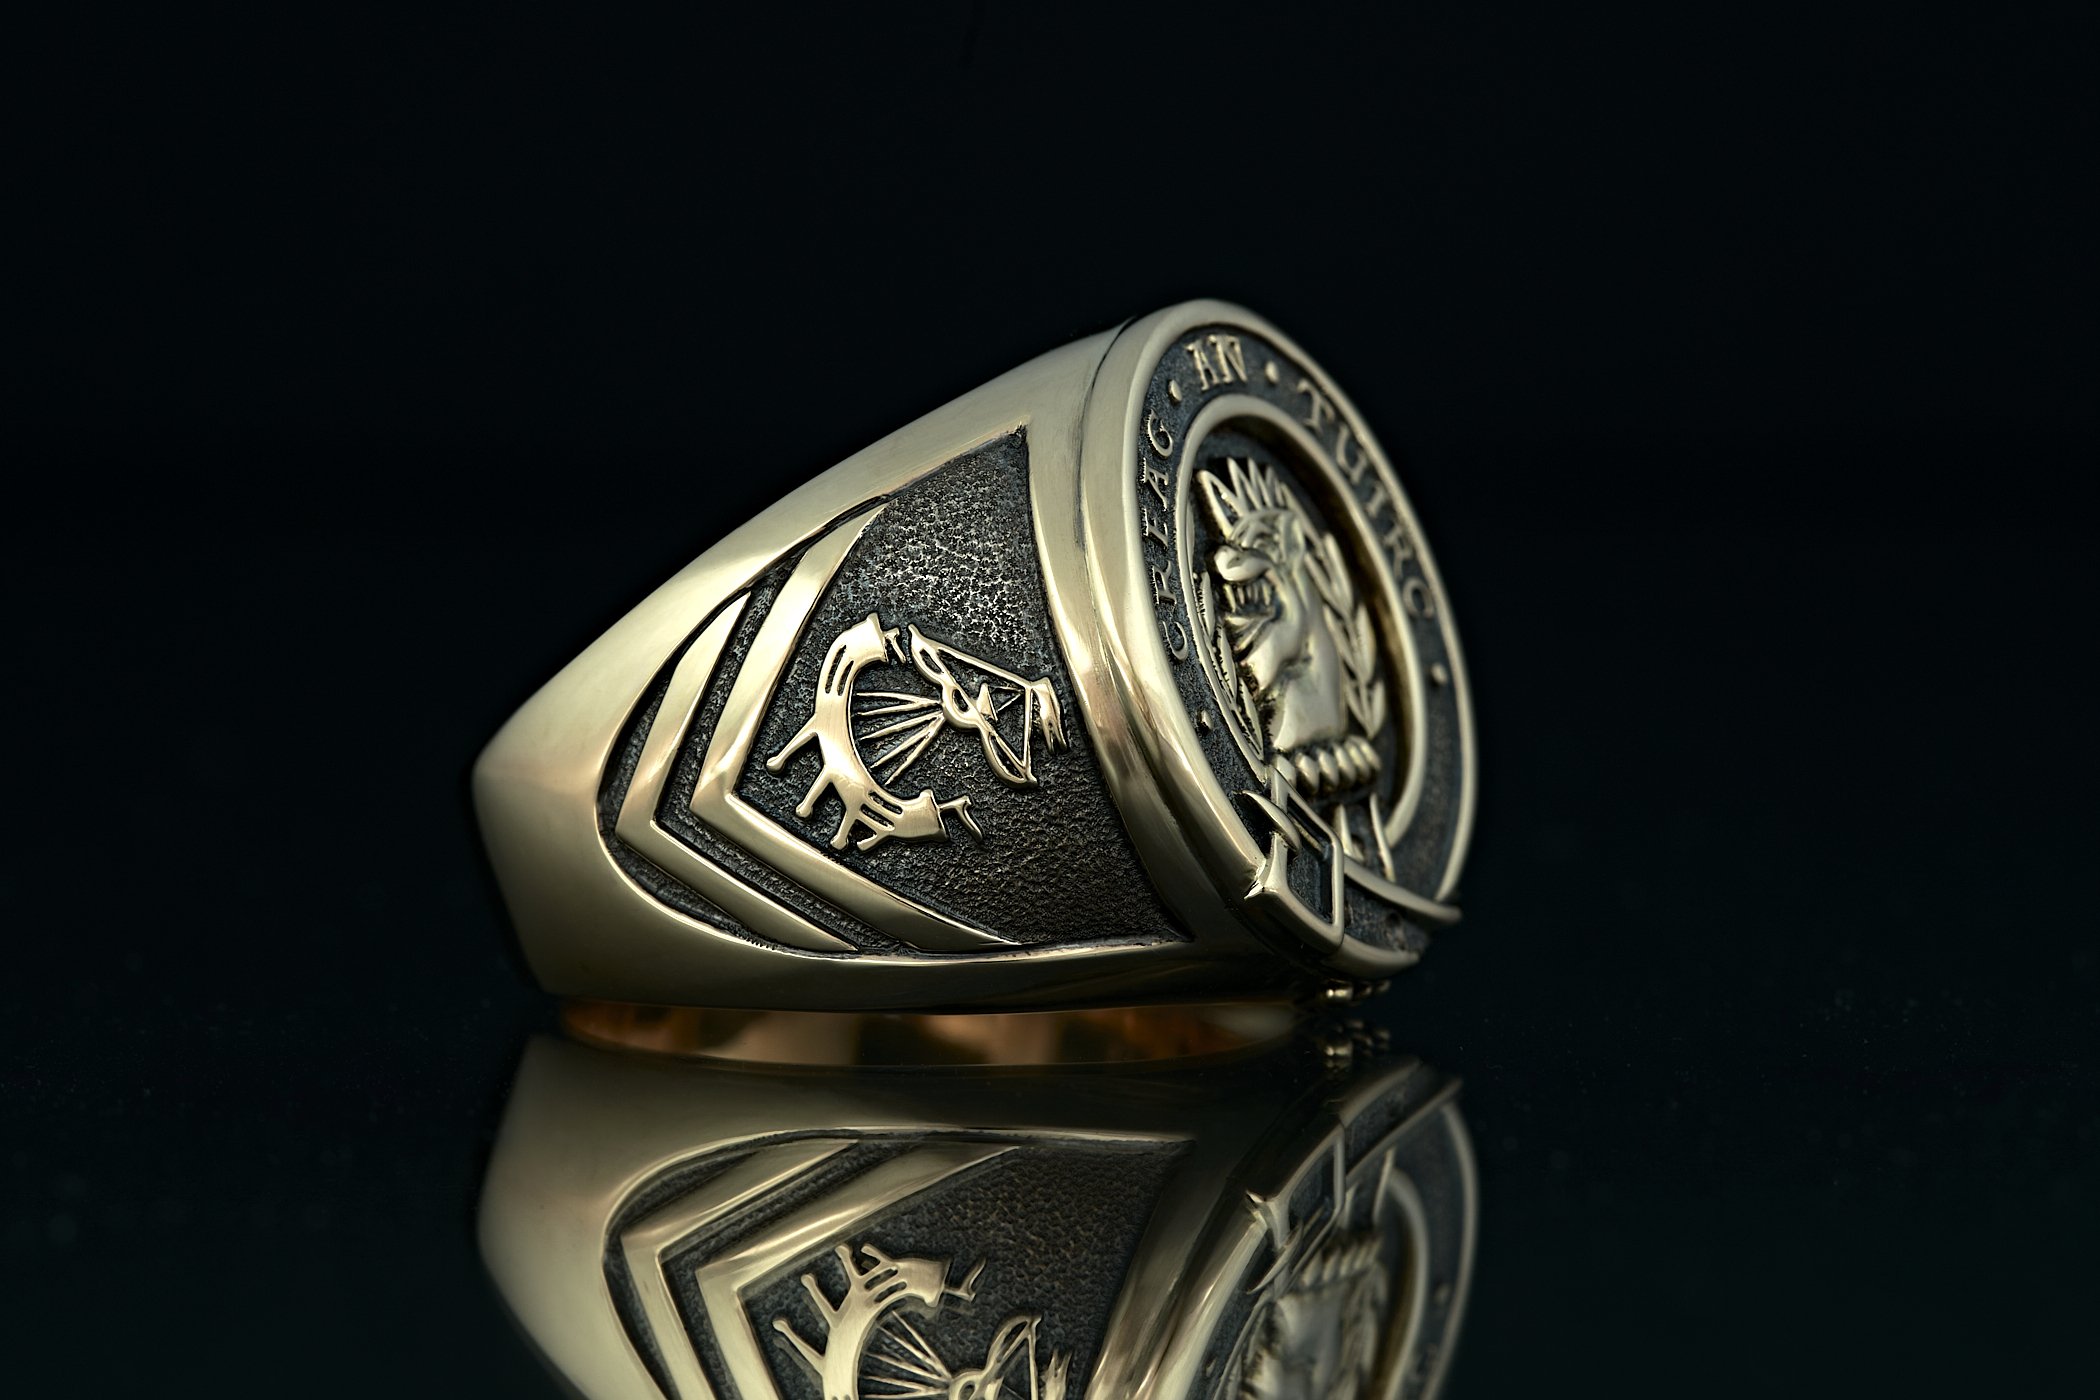
In March of this year I was contacted by a family to make a ring for them. The symbol on the left would go on the top of the ring and the boat and chevrons from a shield on the side.
The biggest issue with getting such detail to work on a piece of jewellery is size. There are some sizes that are not physically possible to work at and others doable but not economically viable.


A bit over a month after the customers had first contacted me I had a rough layout of the design (shown above) which I thought I could create. Based on this I gave them an indication of what the rings would cost each. A ring like this takes many hours to make and would weigh over 20 grams in 9ct yellow gold.
That said the design and planning time for a ring like this is far more than what it takes to make one…….once you know how to make it.
With the ring looking like it would be within budget we continued to explore the design more. This ring will not resize very well so each ring would need to be custom made to each family members exact finger size.
Deciding which finger to wear the ring on.
The first recipient living in Brisbane needed to decide which finger they wanted to wear the ring on. I edited the design onto a photo of his hand to scale. The head of the ring is the same size on both hands but notice how the shape of the side of the ring changes drastically depending on the finger it would be worn on. This is something we could not change later. We needed to get the size right.
Article: Rings that cannot be resized
A ring sizer to gives me a rough idea of where to start.
I express posted a sizer that would give me a rough indication of the finger size the ring needed to be made to. This would be an approximate size. The next step would be the decisive one.
Sizers made to the shape of previous rings.
With an idea of where to start I created a sizer in silver that reflected the internal shape of the ring design we were making and posted it again down to Brisbane.
Variations in a rings shape can effect the size a ring needs to be made to fit the same finger. Generic sizers do not work as well as people think………and remember this ring will not resize well if at all.
If a ring cannot be resized but gets made to the wrong size who is going to pay for it to be remade? If a customer decides to skip the process I use then they are paying…….if they use my process that is included in the cost of making the ring ………then it is made to the right size.

Trials of making the head of the ring.
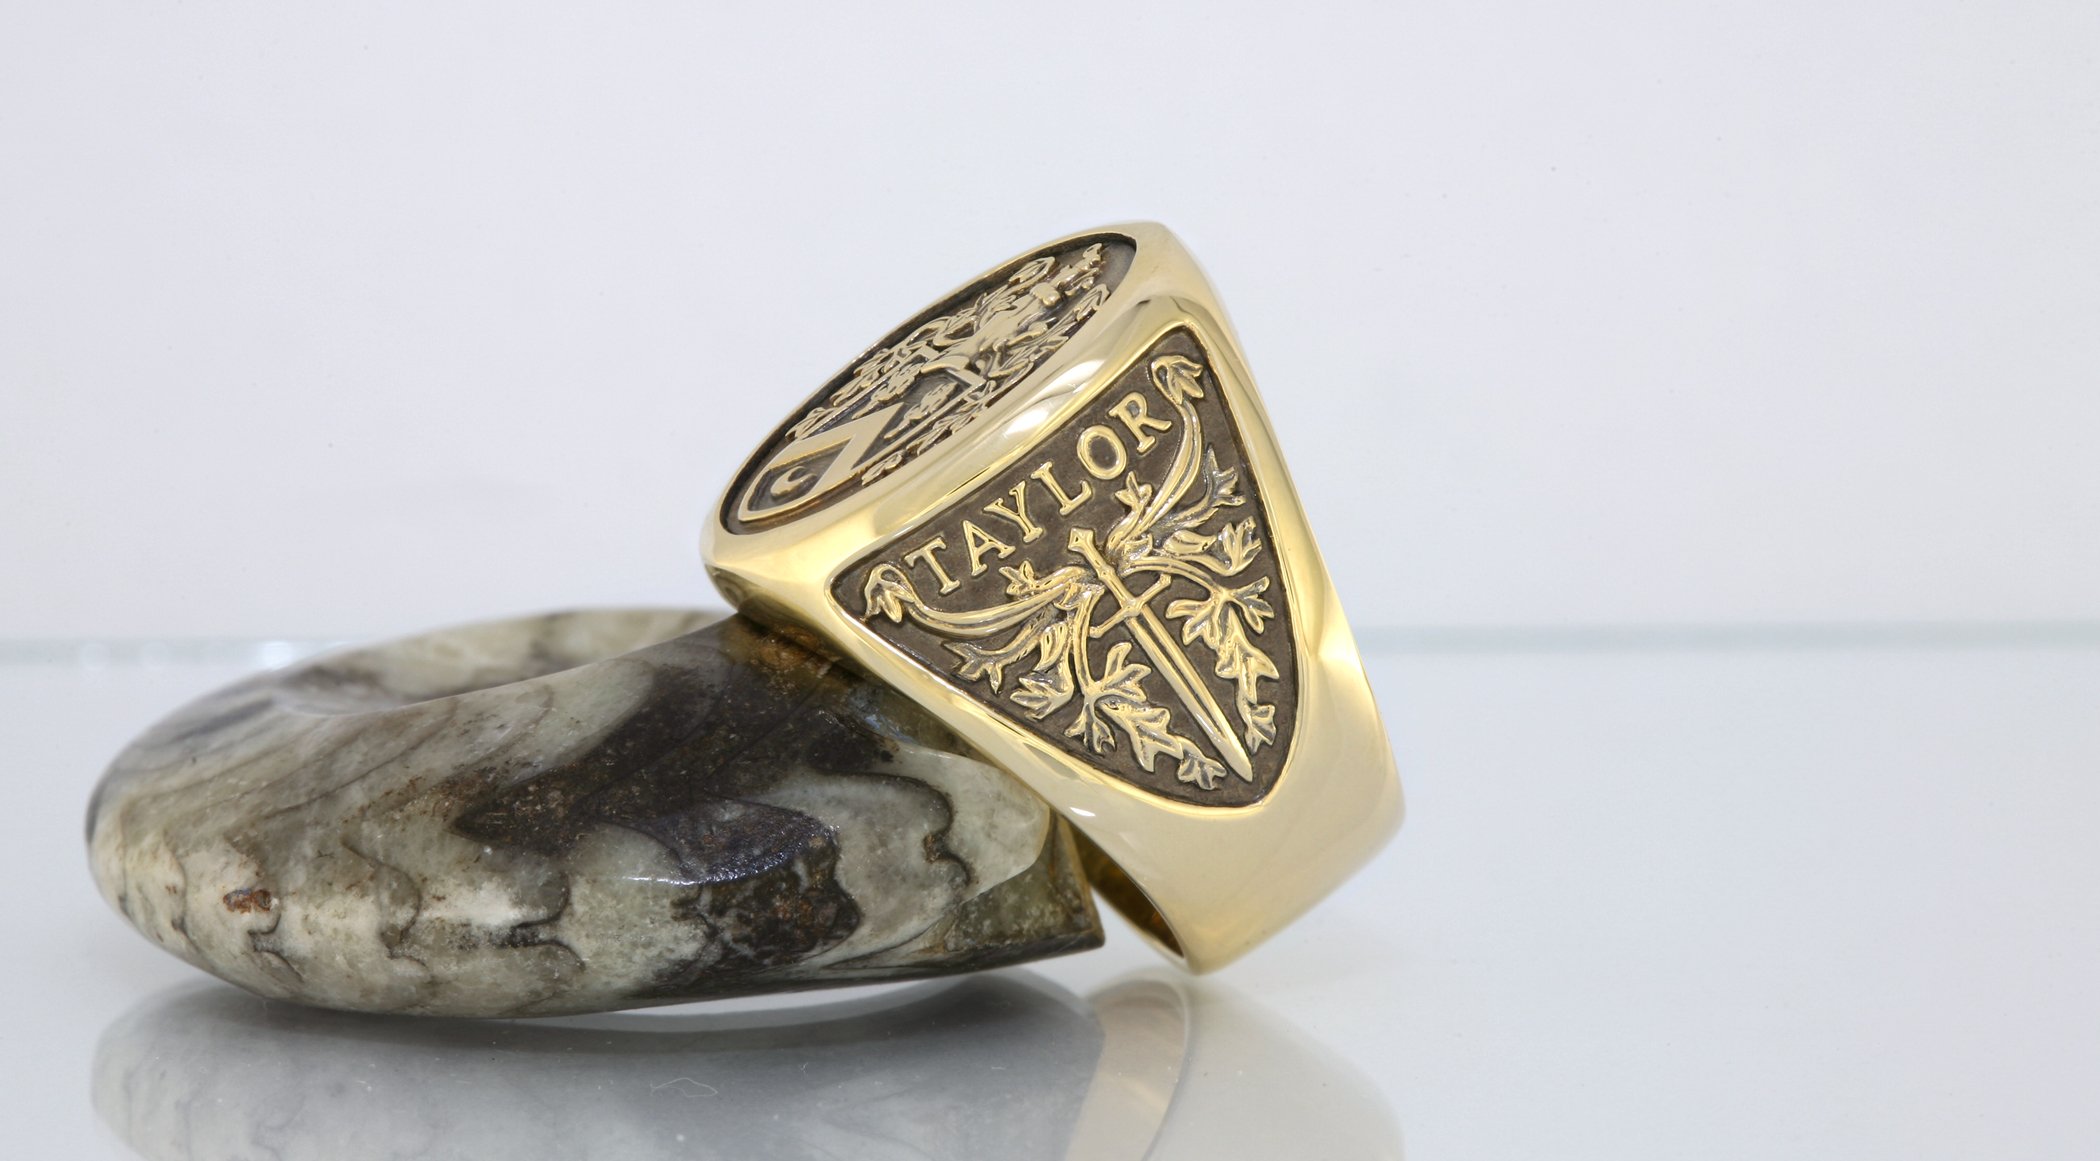
With the finger size determined and the rough outline of the design decided on, for the next few months I trialled making parts of the ring. Some things needed to be changed to make the ring viable to manufacture. The head and surrounding text on the belt were particularly hard to get right and took quite a few attempts.

Finally I have the head and text working.
it is not until September that I finally get the layout of the head and surrounding text to a point where I can create it to a standard I am happy with. Were are now into September!

A trial of the shoulder detail….sorry just a snap with my phone.
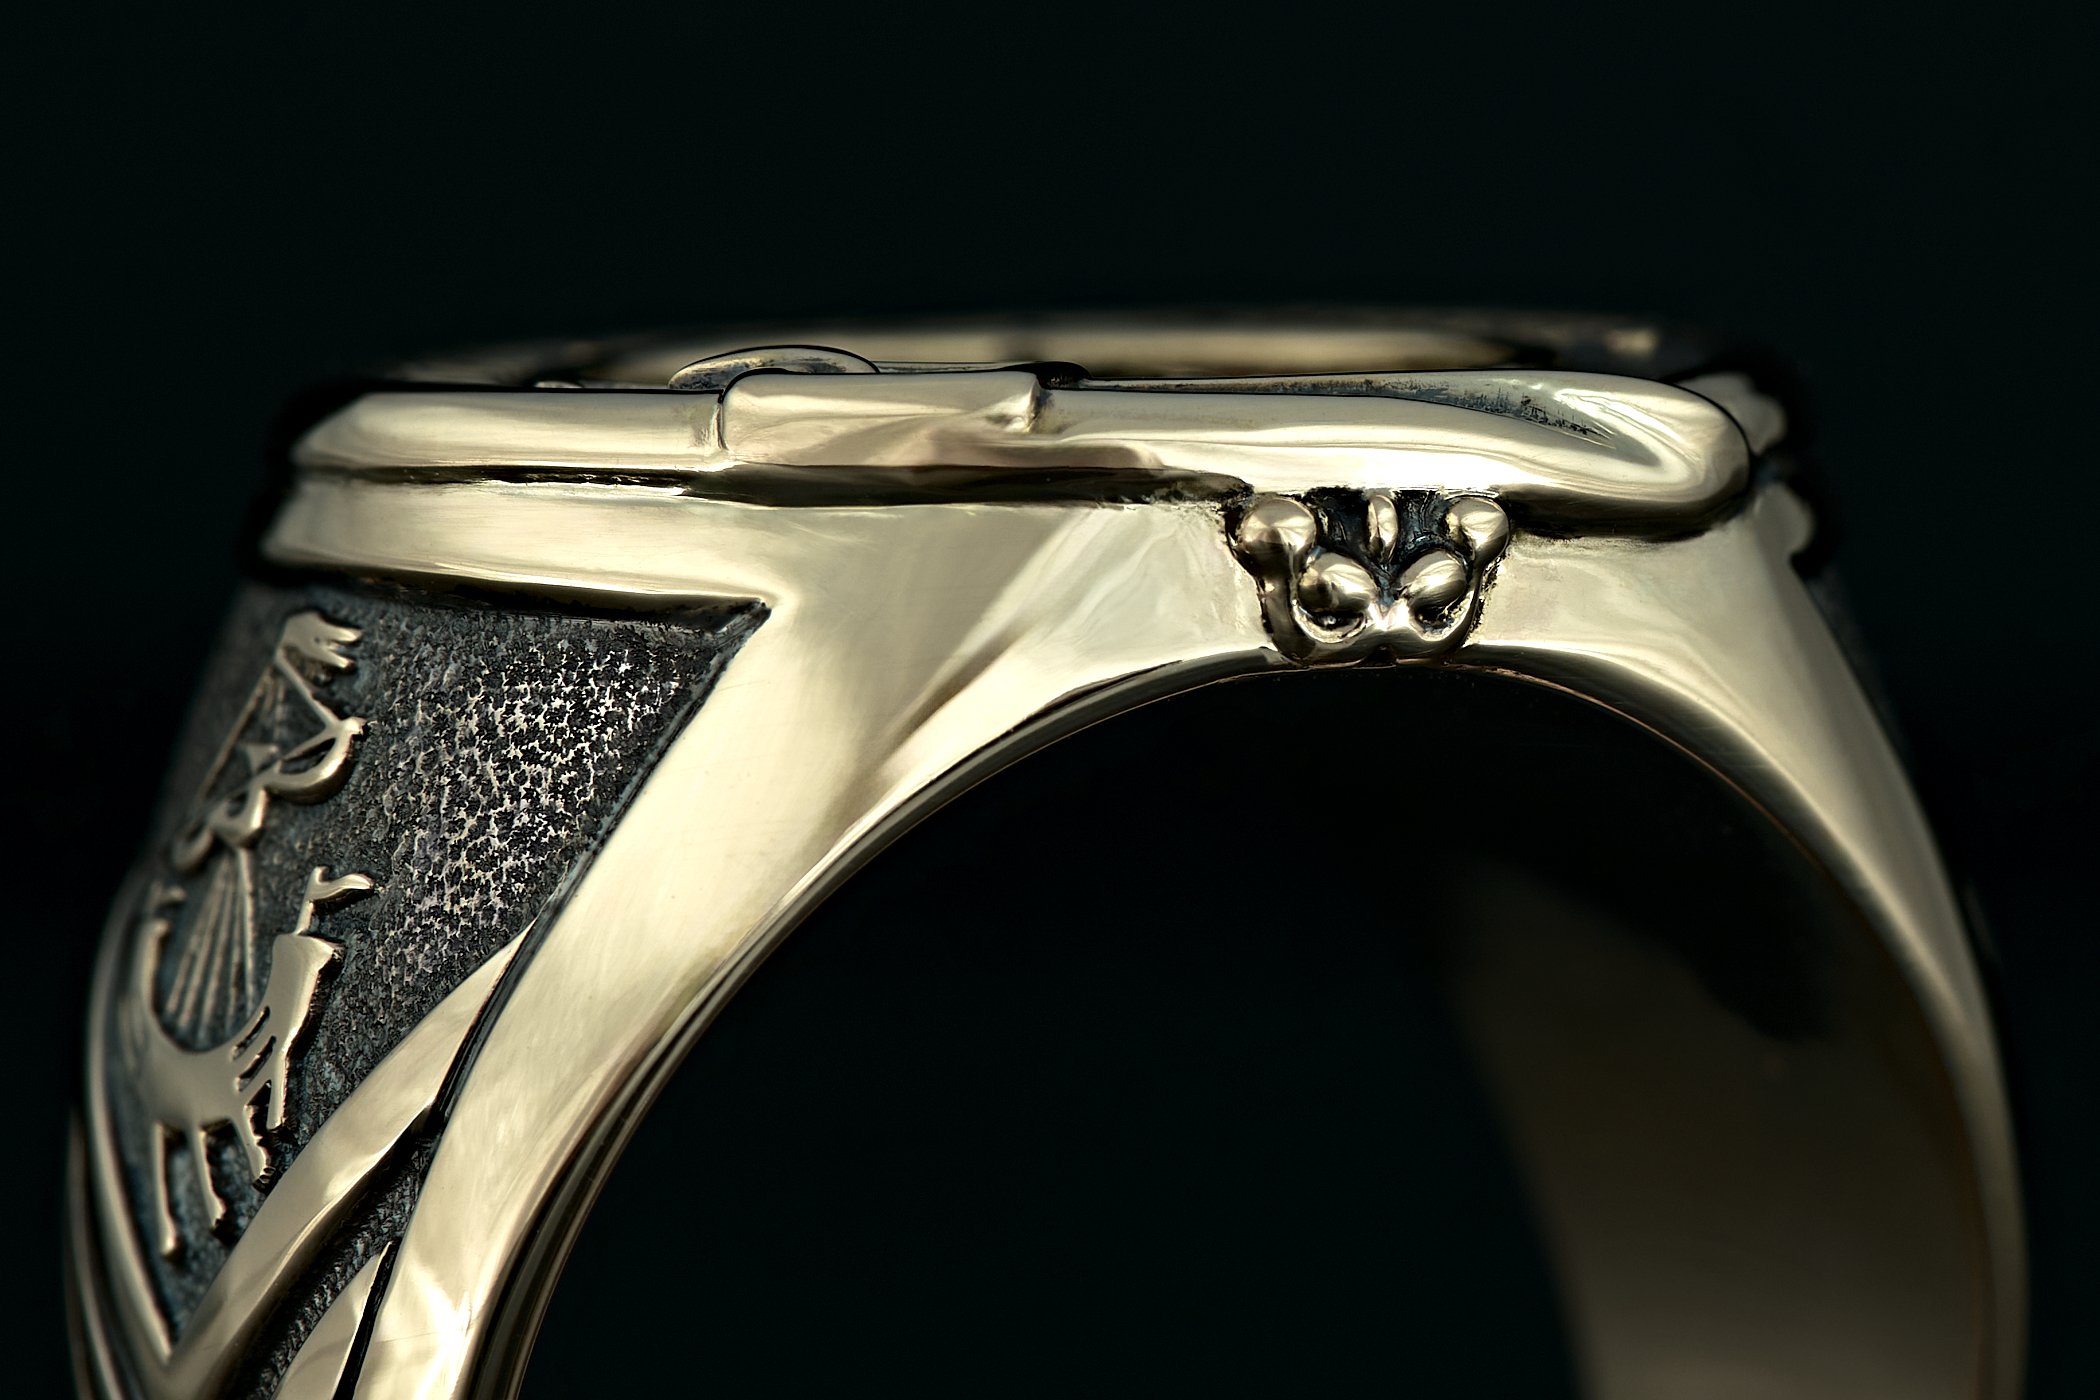
By the end of October I had a successful trial of the ring shoulders also done in silver. I was almost finished but the last part of getting the belt in the design to flow around and into the ring I thought would be the hardest.

The belt wrapping around the top of the ring.
In the end this part of the trial period went really quickly and the above design would work fine. Early November and I was finally ready to start making the ring in gold.

The ring coming together.
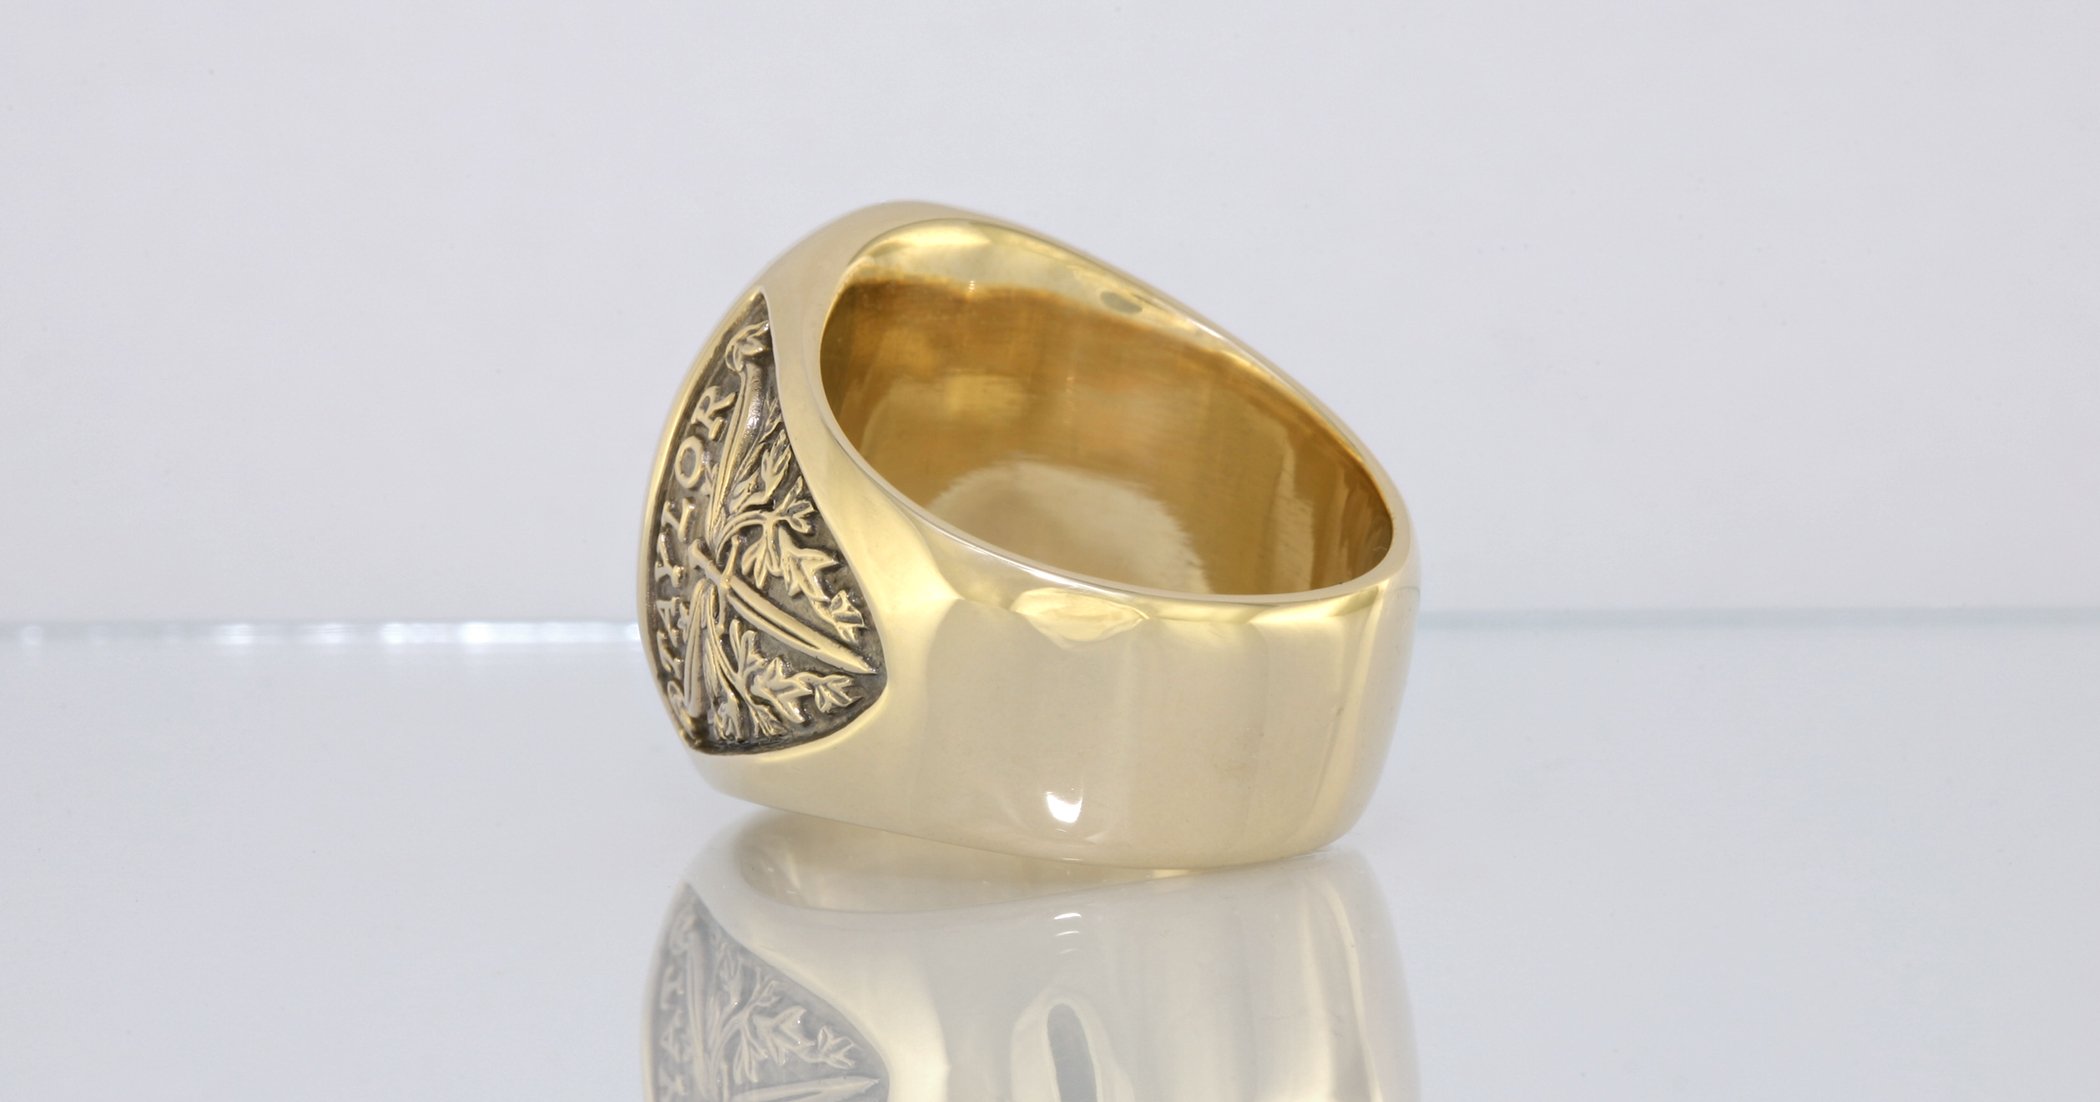
The ring has 5 main pieces, the head, belt with text, 2 shoulders with the boat and chevrons and the rign frame. In the above photo I have already joined the shoulders to the ring frame so it is all fire stained and tarnished in the photo. Next would be to fit the head inside the belt and then join the resulting two pieces together.

The ring nearly finished!
Some of the recipients of the ring will wear it very much as it is shown above. Others however with do as I did with my boys rings, oxidise the recessed areas to give the ring an aged look and highlight the details more.
Now 9 months since starting the design of the ring the first is finally finished. I am currently sizing the rings for the other members and starting to make theirs one by one. The next ones will be quicker :)